Help Configuration, CasparCG
Adding CasparCG servers.
⚠ If SPX is used with CasparCG version 2.3.x LTS is recommended. See CasparCG Releases.
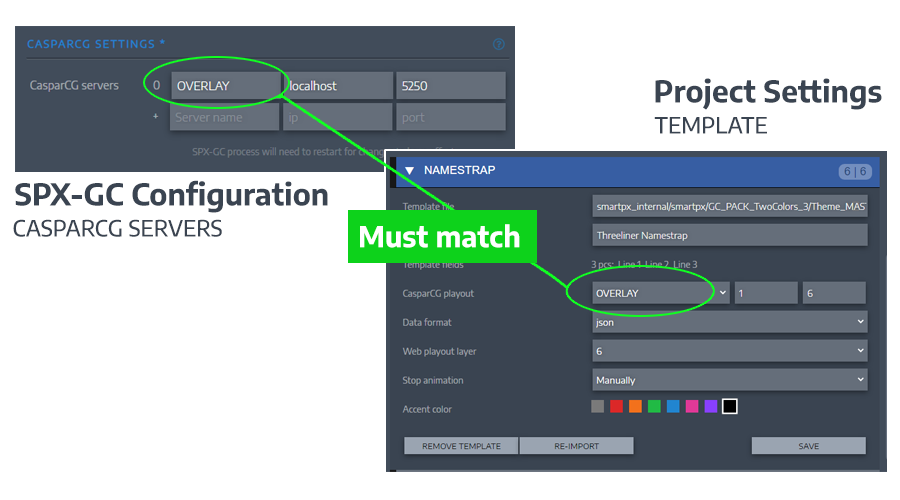
Starting from v.1.0.12 SPX does not have a CasparCG server assigned by default in the configuration. To add CasparCG server(s) go to Configuration and scroll down to CasparCG servers. Add a new server by giving it name such as OVERLAY, ip-address (or localhost) and a port number (5250 is CasparCG's default port). Click on Save at the bottom of the page and there will be an empty line to add another server. Add as many as you have in your production, such as OVERLAY (for CG's), VIDEOWALL, FULLSCREEN etc...
The name OVERLAY is preferred, since this name is used in all SPX Store templates and the default template pack which comes with the application. Note: use only alphanumeric names for CasparCG servers, without special characters or spaces.
Each SPX template has a setting for choosing a target CasparCG server. This server is assigned in the template settings within Project Settings. (Default value comes to the project from the HTML sourcecode of the template as the 'playserver' -parameter of the TemplateDefinition object.) The name must match with one of configured servers for the playout to work.
If you have problems during playout it is recommeded to set log level higher and observe SPX console window messages for potential cause.
REMEMBER SPX server process must be restarted whenever changes are made to configuration.
Need more info? Join the SPX Discord server and ask us and the SPX community in real time.