Add SPX Graphics to Microsoft Teams meetings
Improve your video presence with SPX overlays
SPX can also help make your online meetings more impactful, personalized, and professional. Just add live graphics to your meeting and you will be noticed.
This article outlines the basic steps and they mostly apply to Microsoft Teams, Google Meet, Zoom Meetings, or similar platforms and tools.
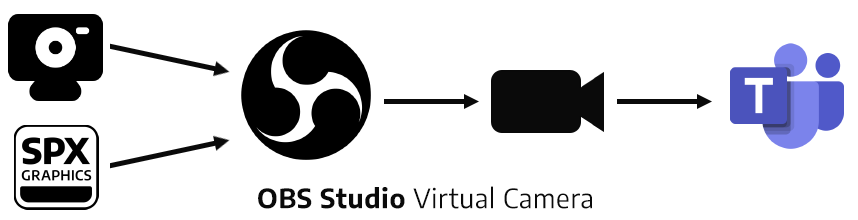
The process will roughly be:
- Install SPX Graphics
- Install OBS Studio
- Add webcam to OBS using Video Capture Device
- Add SPX Graphics to OBS using Browser Source
- In Teams change the camera to use OBS Virtual Camera
Tools needed
- Computer + Webcam
- SPX Graphics application
- OBS Studio application
- Meeting software (Teams, Meet, Zoom...)
We assume you have a computer, a working webcam, and a microphone, so we will only concentrate on the remaining parts.
It is a good idea to exit from your meeting application before proceeding. Otherwise, settings may get confused and setup will require more IT attention. (Remember, the Teams application must be quit separately, it does not quit really when you close the window, the application is most likely still running minimized in your Taskbar's Notification Area.)
1. Install and run SPX Graphics
SPX Graphics runs in a local server process, its user interface runs in a browser and the graphics it produces can be utilized in OBS and your meeting application.
Go to spx.graphics/download and install the app on your computer and run it.
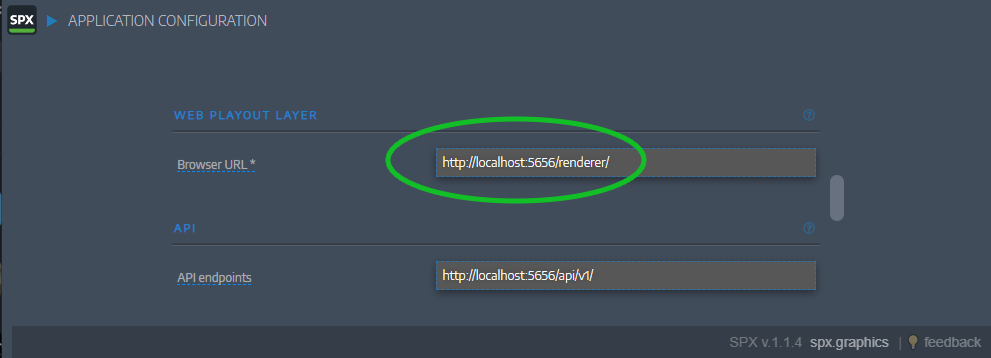
Once SPX is running, go to HOME > Application Configuration > Browser URL and copy it to your clipboard. In most cases the address is http://localhost:5656/renderer/
2. Install and run OBS Studio
Open Broadcaster Software (OBS) Studio is a versatile software that can bring in several sources and can output everything as a virtual camera. We will use OBS to combine our webcam image and the transparent, animated, real-time graphics from SPX.
Go to https://obsproject.com/download and install the app on your computer and run it.
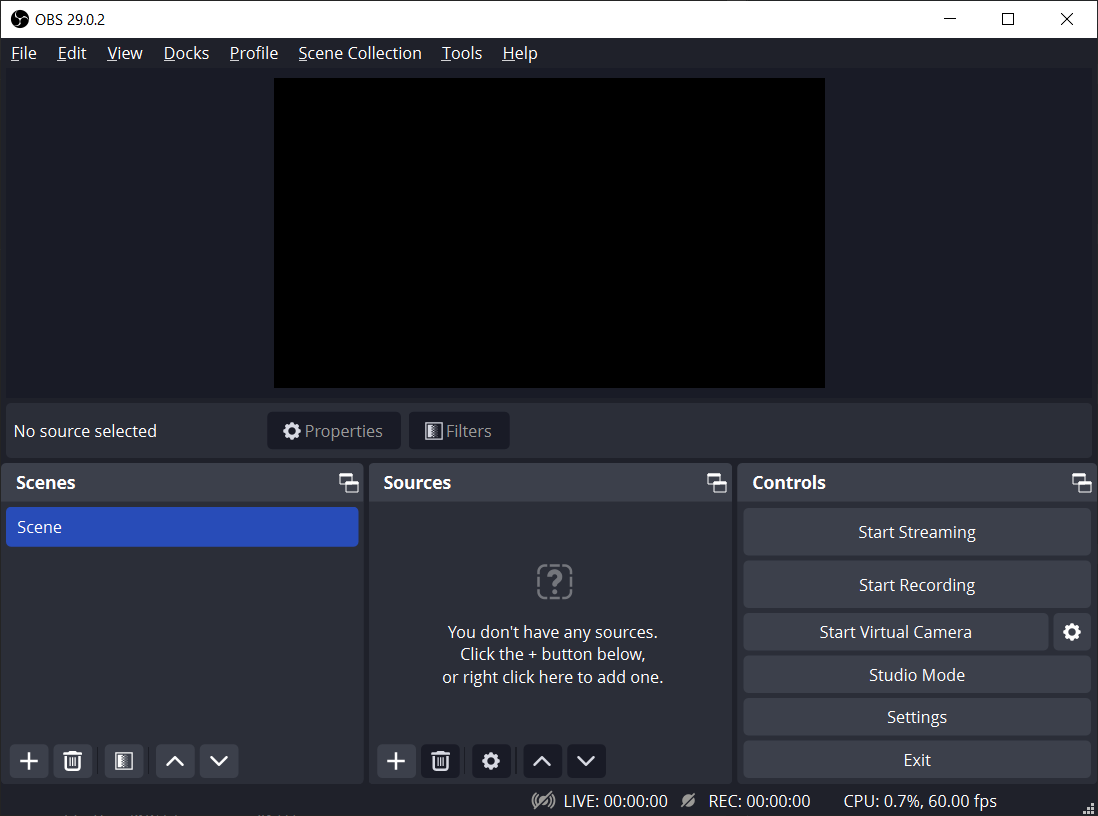
A fresh install of OBS with nothing in it. The output screen is completely black.
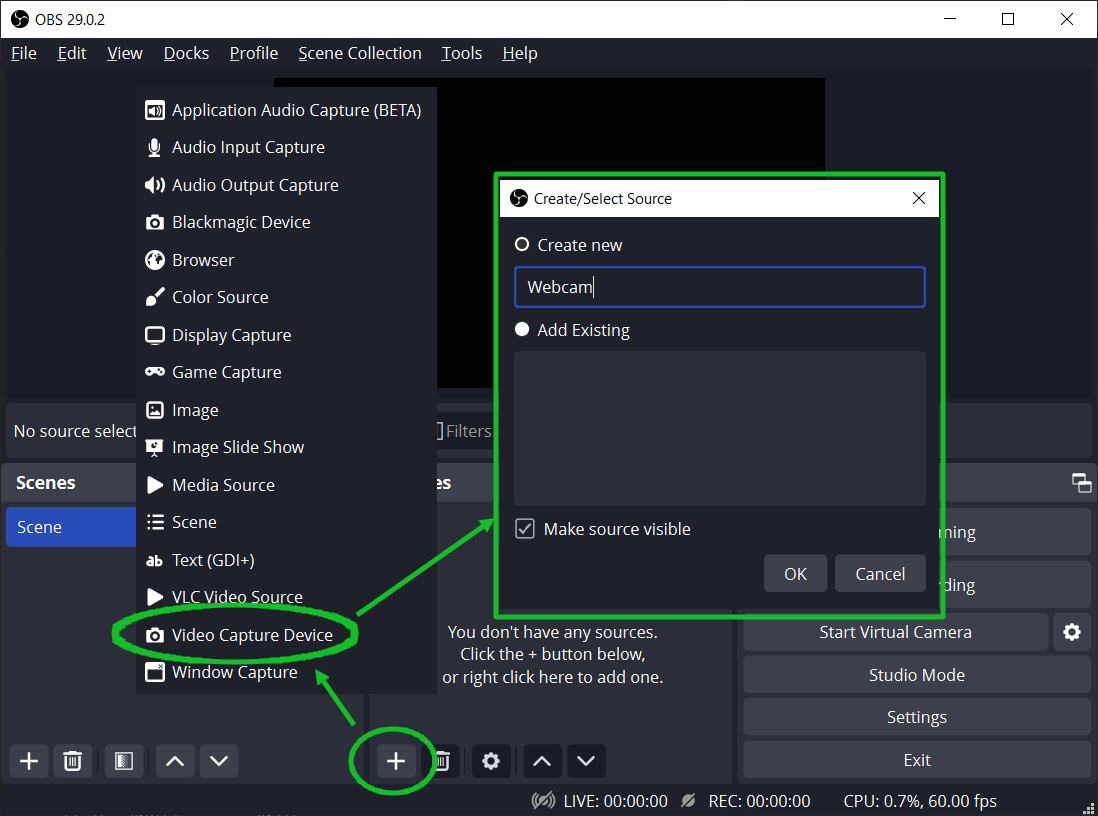
Once running go to Sources and
- Click + button to add a source and choose "Video Capture Device"
- A popup window appears, choose the "create new" option and give it a name, such as "Webcam".
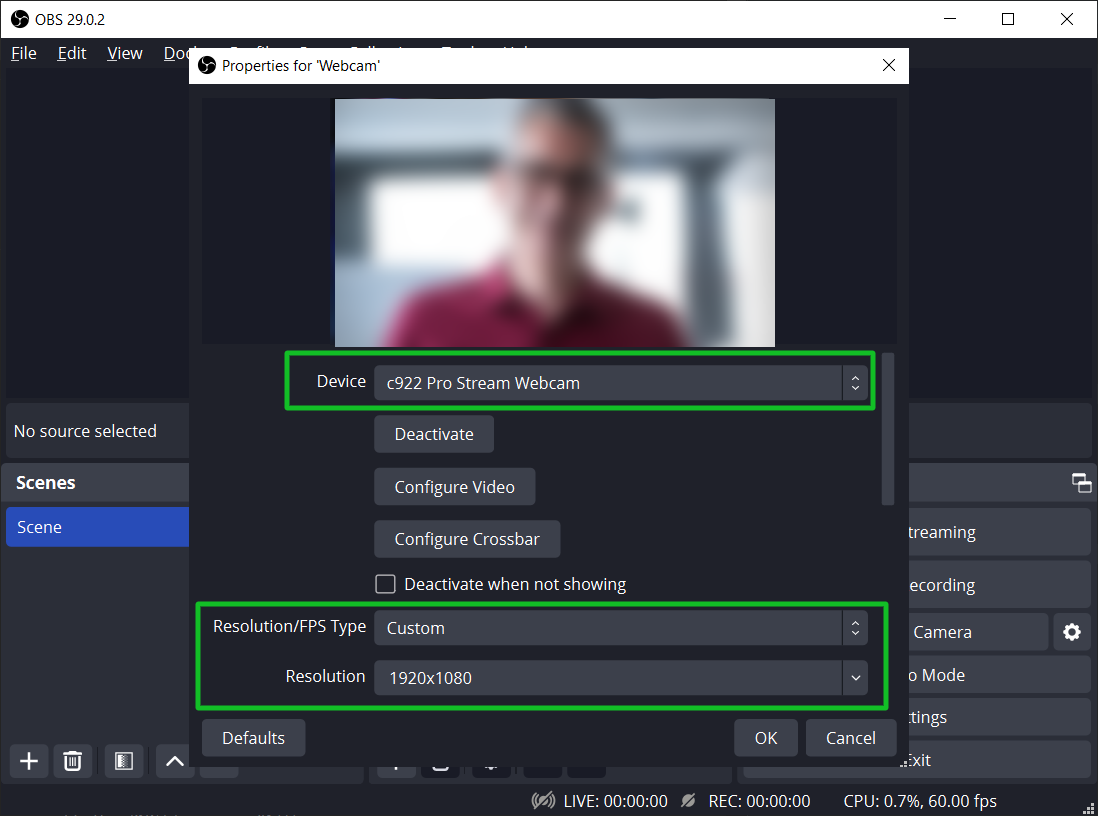
A camera properties window appears, select
- your webcam from the Device list (your image should appear)
- change resolution to Custom and
- set size to 1920x1080 (i.e. full HD resolution)
The camera is now in place, next let's add SPX.
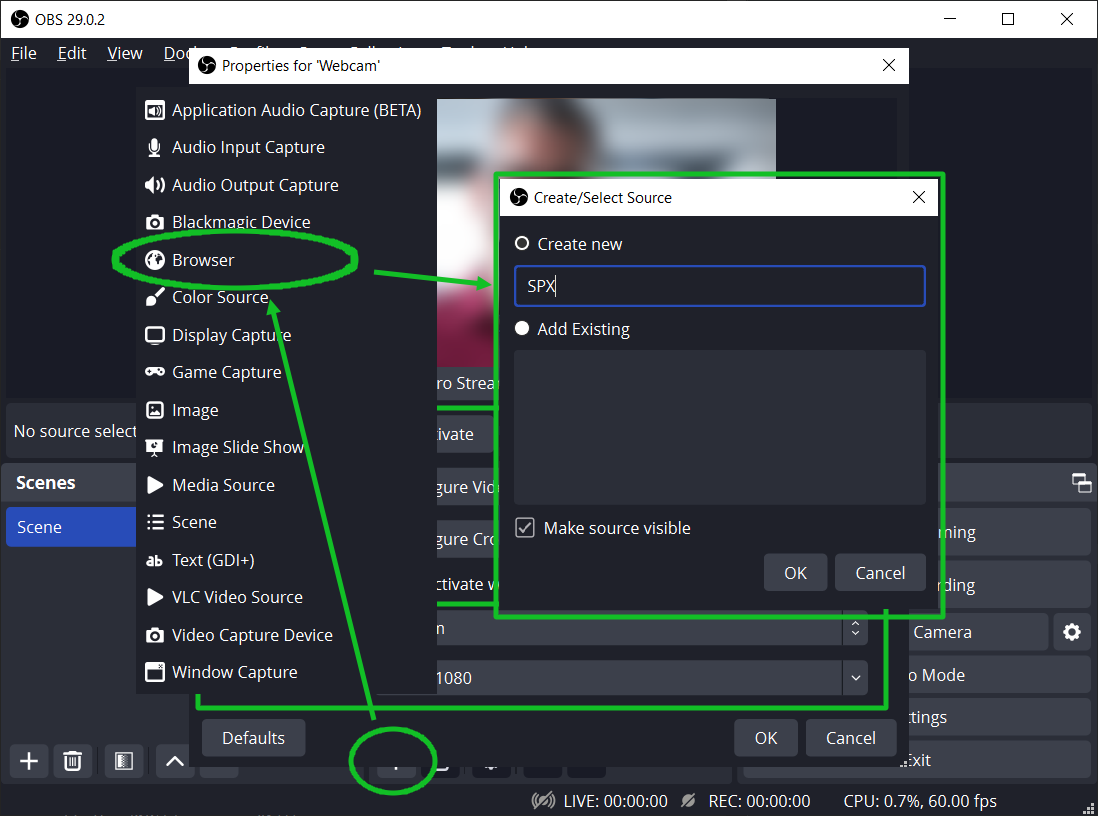
Click + in the Sources again, this time
- choose "Browser"
- A popup window appears, choose the "create new" option and give it a name, such as "SPX".
A browser properties window appears
- paste SPX's renderer URL from your clipboard (typically http://localhost:5656/renderer )
- change width to 1920 and height to 1080
- Click OK to set properties
Now we have two Sources in our OBS Scene: Webcam and SPX on top of it.
3. Test SPX Graphics in OBS
Go to your SPX in the browser (typically http://localhost:5656/ ), open any project, open any runtime, and play any item and the graphic should appear over the video in OBS.
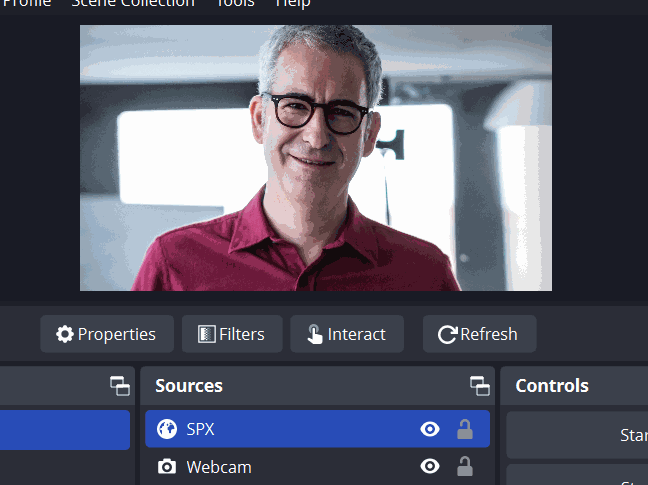
So we can see SPX graphics playing over our webcam video in OBS, great!
4. Use OBS as our meeting camera
The next step is to send output from OBS to our meeting app. This is done with the help of the Virtual Camera feature of OBS, which is NOT on by default.
Advanced tip: there is a way to always force OBS to have a Virtual Camera on at the app start. You will need to add the "--startvirtualcam" command-line parameter to the launch icon of OBS to enable it.
- Click the Start Virtual Camera button in the Controls dock
- Start your meetings app, such as Microsoft Teams
- Start a meeting (if necessary)
- Go to Settings > Device Settings > Camera
- and choose OBS Virtual Camera as your camera input for the meeting
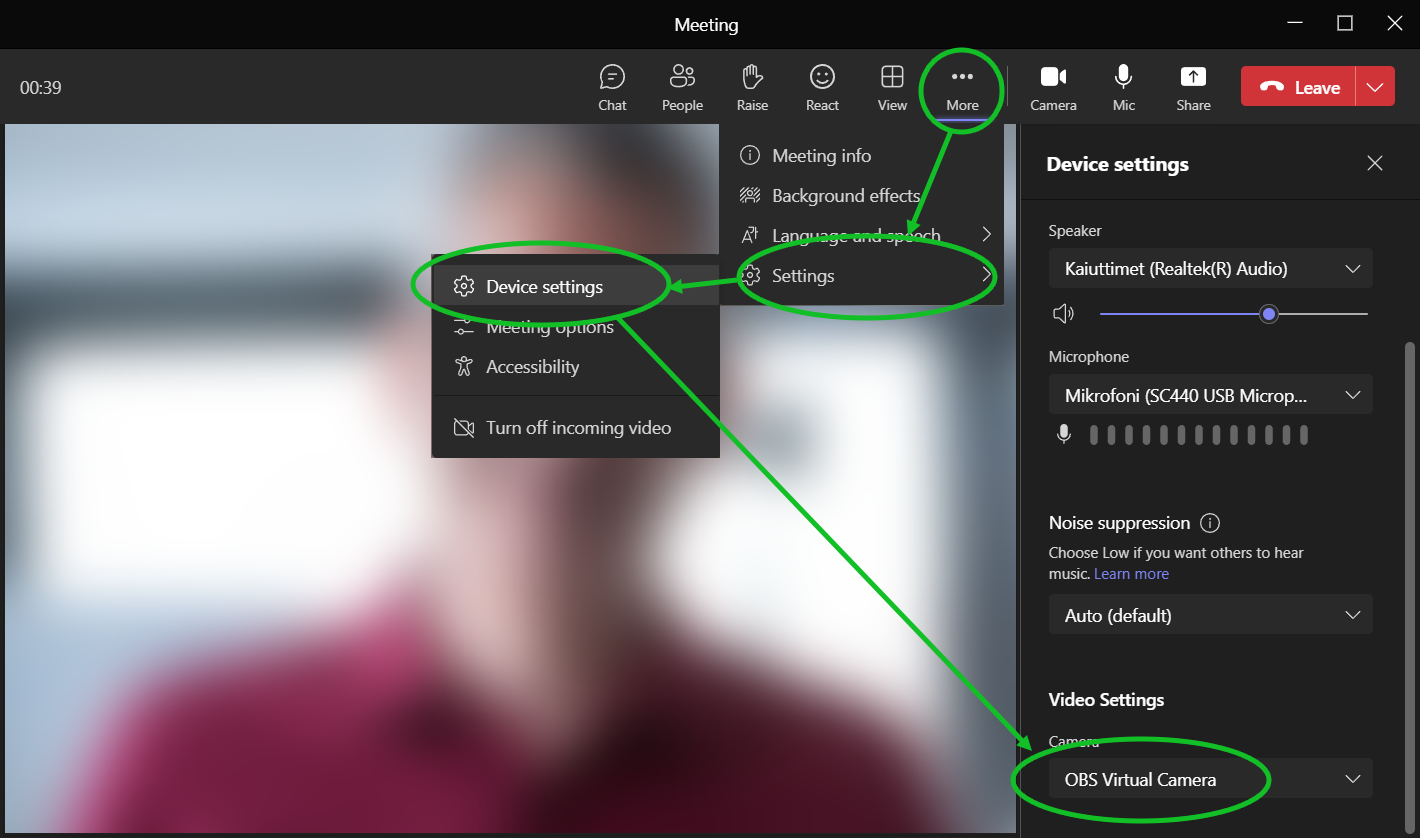
Done! Now you should have a working webcam coming to your Teams with SPX Graphic from OBS.
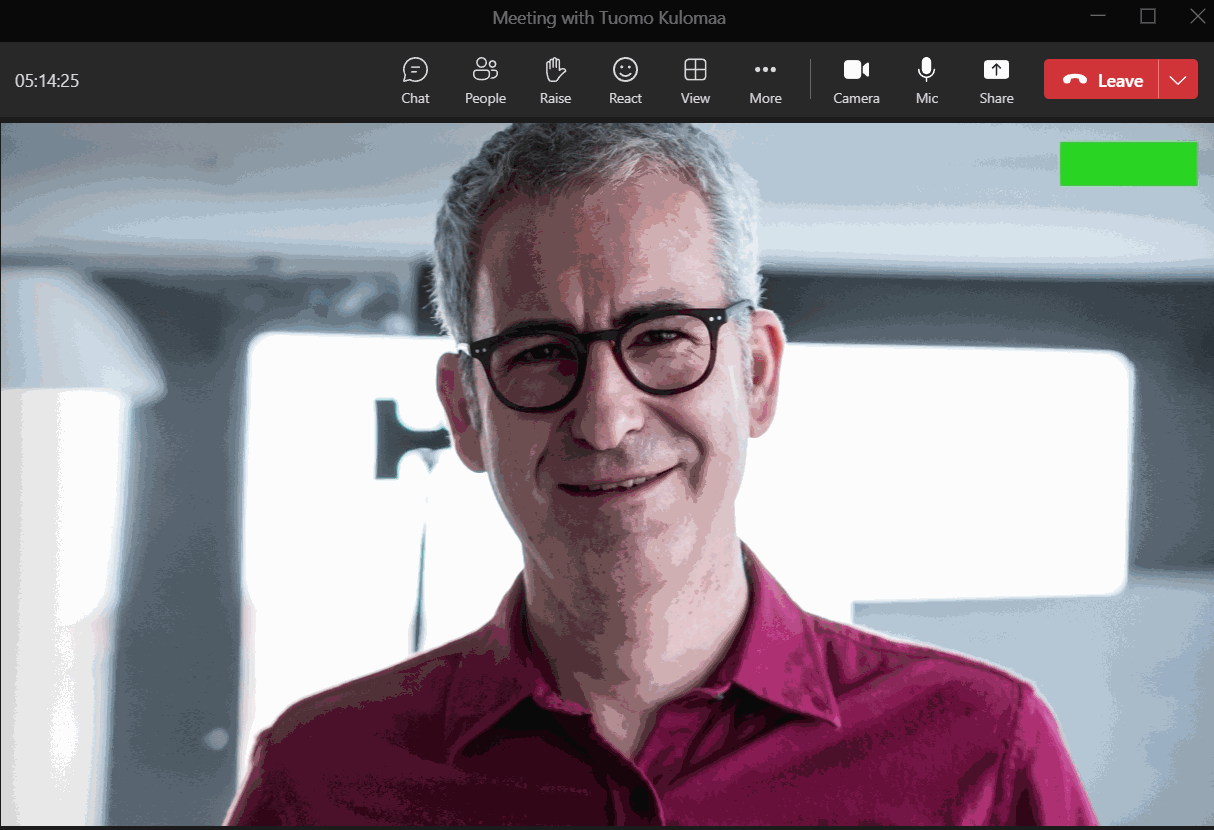
( A low frame rate GIF screen capture)
Remember, depending on your application settings, you may see your graphics "mirrored" but your viewers will always see them correctly.
With SPX you can add lower thirds, logos, tickers, countdowns, or other overlay or fullscreen SPX templates.
See SPX Store for additional templates, both free and premium items are available.
When using just a single monitor or a laptop for video meetings, it can be difficult to have several software windows open for running graphics. Using an external device for graphics triggering may be more efficient. Read how to use SPX with Stream Deck.